طريقة عمل فستان بسيط وخفيف للبنوتات الشرح من أحدى المواقع الأجنبية
تاج لشعر
باترونات فساتين


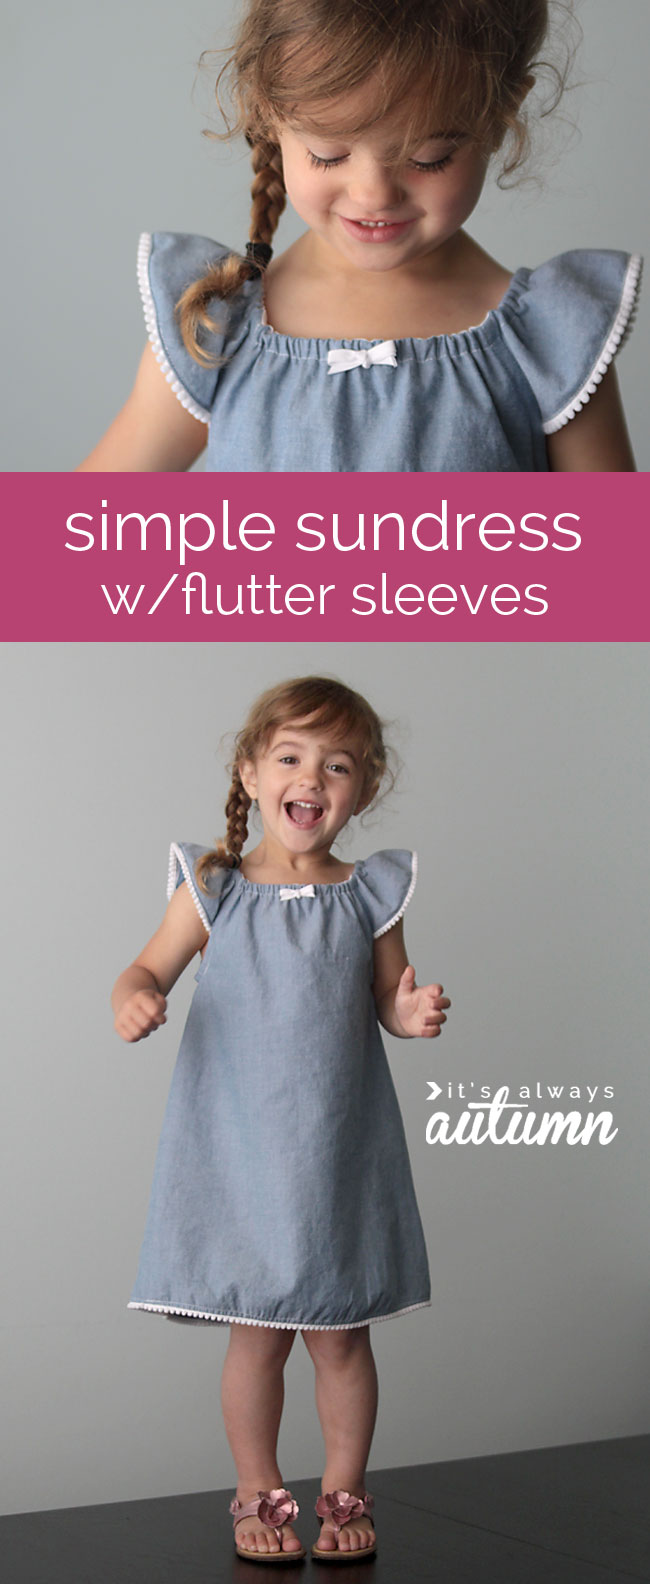
http://www.itsalwaysautumn.com/2014/06/15/simple-girls-sundress-flutter-sleeves-sewing-tutorial.html

مجموعة فساتين مع الباترون


Here is what you will need
1/2 yard cotton fabric
1/4 yard coordinating fabric for the sleeves
15 inch of 1/2 inch wide elastic for the neck
7.5 inch (x2) of 1/2 inch wide elastic for the sleeves
Download the pattern here. When printing, make sure you scale to 100% or actual size. The pattern already has 0.5cm seam allowance so you just need to cut right on the line. After you have all your pieces cut out, line them up together. When you line up the body pieces, tape it up together and place it on the fold of your fabric, cut it out.

Since you cutting on the fold, you will have one piece for the front and one piece for the back. Do the same thing for your sleeves, except you dont need to cut on fold. After you cut all your pieces, this is what you should have:

Now lets start making this dress!
Iron out your pattern pieces
Take one sleeve and lay it out with wide side facing you. Fold in 0.5 cm on the top and bottom sides, iron it down. Fold it again 0.5 cm and iron it down. Do the same for the other sleeve It will look like this:

Now take one of your body pieces with the wrong side up and iron down 0.5 cm. Do it again, ironing down 0.5cm like you did with the sleeves. Do the same thing for the top of the neck line. Do the same for the other body piece.

Now line up one sleeve and one body piece together with pins. This is what it should look like:
Sew the sleeve on leaving 0.5 cm seam allowance. You can zig zag the ends so it doesn’t fray. Repeat for the other sleeve on the other side of the same body piece. Lock your seam in by ironing. It will look like this:


 |
| Both sleeves right sides facing right side of front body piece |
Now, take the second body piece and pin the loose sides of the sleeves to the other side of the body piece. Pin the side seam under the arm down to the bottom hem. Sew from under the arm down to the bottom hem of the body using 0.5cm seam allowance which you can zig zag to prevent fraying. Lock your seam in by ironing. When you are done attaching both sides of the sleeve to the back body piece, it will look like this:

Sew the sides of the dress together from arm to the bottom. Zig zag your ends to prevent fraying. Iron out the seams to give it a clean finished look.


Now fold in the bottom hem and sew close.
Back to the top of the dress- fold down the neck hem that you created earlier. Sew around the neck leaving about 2 inch opening to put in the elastic. Pin the elastic onto a safety pin and push it through until you have it all the way around. Sew both sides of the elastic close using zig zag stitch. Sew the 2 inch opening close. Repeat this for the bottom of the sleeves. To get the elastic into the sleeves may be tricky with a safety pin since its so small. I used a hair bobby pin to do mine. Here is what it looks like:-)


After you finish the elastic, make a fabric flower to put on the upper right hand side. This is optional but I really think it makes it stand out. You can take a look at this tutorial to learn how to make the flower.
There you have it! Have fun and comment if you need help or have questions.
 |
| Brynlee and Braylee on their first birthday! |


ليست هناك تعليقات:
إرسال تعليق